Back to Energy Manager Main Menu
Managing batches
Batch management helps you to streamline your bill entry process. You can validate and approve batches, as well as export batches to a third-party accounts payable system. *Note: If you do not currently have the Export or Approve buttons, please contact your Sales Representative or Client Services for more information.
To access Batch Management:
- Click on Billing Data from the navigation menu.
- Select the Batch Management panel.
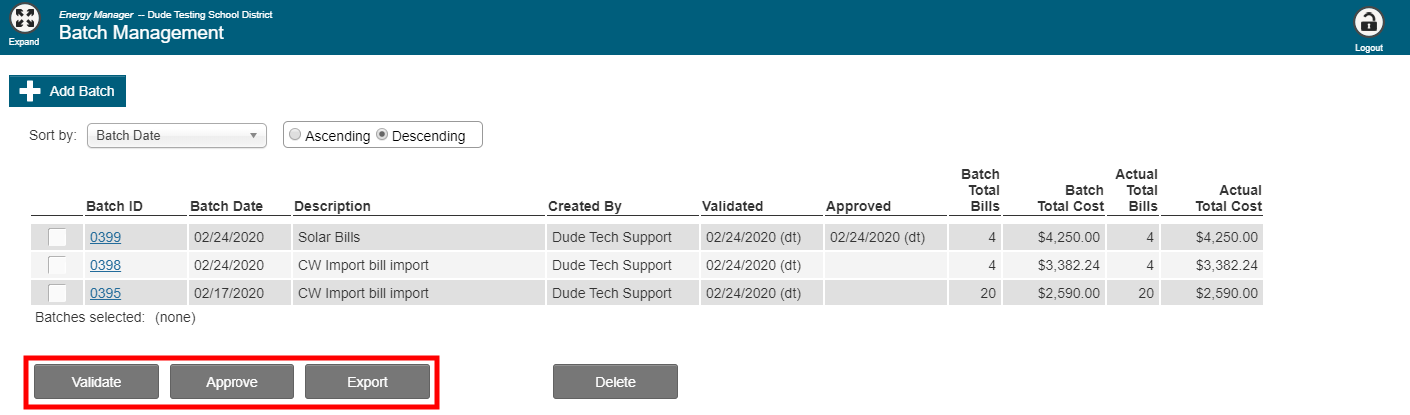
How to validate a batch
Batch validation helps ensure that accurate utility bill data has been entered into the system.
- From the batch list, check the box next to the Batch ID you want to validate.
- Click the Validate button at the bottom of the page.
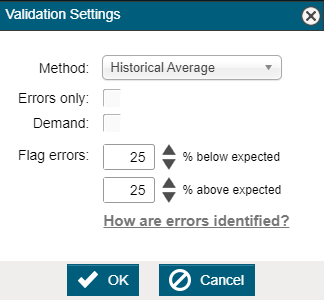
- On the Validation Settings page, choose the validation Method from the drop-down menu:
- Historical Average: Energy Manager will calculate the average bill days, usage, cost, and unit cost and compare them to the bills in the selected batch.
- Previous Year Bill: Energy Manager will compare the usage, cost, bill days, and unit cost of bills in the selected batch to the matching values from the previous year's bill.
- Check the Errors only box to display bills in the validation results only when the variance exceeds the defined percentages.
- Check the Demand box to include the Actual and Billed Demand % Variances in the validation results.
- In the Flag errors section, enter the variance thresholds in the % below expected and % above expected fields.
- Click OK to display the validation results.
- If the validation results are above or below the variance thresholds, the Batch Validation Report will display a positive or negative % Variance. If the results are within the variance tolerance, the % Variance will be displayed as N/A.

How to approve a batch
Batch approval allows you to review and approve your bills prior to exporting them to your accounts payable system. This option can also be used when your bill entry workflow requires a supervisor's verification and approval prior to payment.
- From the batch list, check the box next to the Batch ID you want to approve.
- Click the Approve button at the bottom of the page.
- Click Yes to approve the selected batches.
How to export a batch
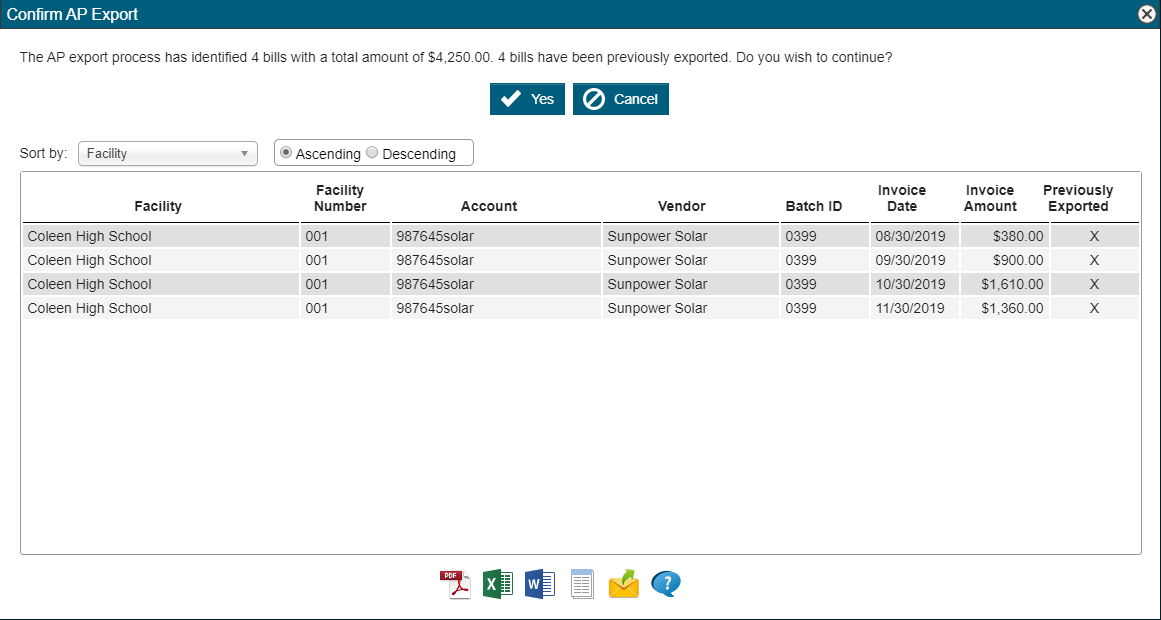
The AP Export allows you to export your billing data in a format that can be imported into your accounts payable system. *Note: The AP Export will require the creation of a custom output file and destination types, such as download, FTP, and/or email. Please contact Client Services if you have questions about this process.
- From the batch list, check the box next to the Batch ID you want to export.
- Click the Export button at the bottom of the page.
- In the window that appears, click Yes to generate a file that can be imported into your accounts payable system.
How to delete a batch
*Note: We recommend that you do not delete a batch in order to preserve the history of data entry tied to the batch. Deleting a batch will only remove the batch information and will not delete the bills associated with the batch. If you would like to delete the bills associated with a batch, please contact Client Services for assistance.
- From the batch list, check the box next to the Batch ID you want to delete.
- Click the Delete button at the bottom of the page.
- Click Yes to delete the selected batches.
